


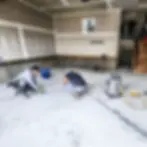
Our Comprehensive Epoxy Flooring System Process
A successful epoxy floor depends on proper prep.
-
Inspection – Check for cracks, moisture issues, or oil stains.
-
Cleaning – Remove grease, dust, adhesives, or old coatings using degreasers or solvents.
-
Grinding/Shot Blasting – Mechanically profile the concrete surface for better adhesion.
-
Crack & Joint Repair – Fill cracks, holes, and expansion joints with epoxy patching compound or mortar.
-
Moisture Testing – Use calcium chloride or RH test to ensure no excessive moisture vapor transmission.
-
-
Primer Coat – Apply epoxy primer to penetrate pores and enhance adhesion.
-
Benefits: reduces air bubbles, seals the concrete, strengthens the bond.
-
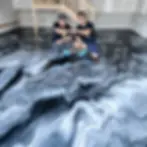
Application – Roll or squeegee evenly across the floor.
-
-
Mixing Epoxy – Combine resin and hardener thoroughly according to manufacturer’s ratio.
-
Application – Pour in ribbons and spread with notched squeegee, then back-roll for even thickness.
-
Optional Pigments – Add color pigments for decorative effect.
-
-
Flakes/Design Pigments – While base coat is wet, broadcast vinyl flakes, quartz sand, or metallic pigments.
-
Coverage – Can be light, medium, or full broadcast depending on the design.
-
-
Once base coat cures, scrape excess flakes and vacuum loose particles.
-
Ensures smooth surface before applying topcoat.
-
-
Clear Epoxy or Polyurethane – Seals the flakes/pigments and provides chemical, abrasion, and UV resistance.
-
Application – Roll evenly to achieve glossy, semi-gloss, or matte finish.
-
Anti-Slip Additives – Mix in silica or aluminum oxide grit if slip resistance is needed.
-
-
Initial Cure: 12–24 hours (light foot traffic).
-
Full Cure: 5–7 days (vehicle traffic, heavy loads).
-
Inspection – Check for bubbles, uneven spots, or missed areas.
-


Epoxy Layering System
Every flooring system has a unique layering structure meticulously designed to enhance both its aesthetic appeal and performance.

Metallic Epoxy System
-
Original Surface
-
Base Coat
-
Primer Coat
-
Metallic Coat
-
Super Clear Polyaspartic

Solid Color Epoxy System
-
Original Surface
-
Base Coat
-
Solid Color Coat
-
Super Clear Polyaspartic

Flake Epoxy System
-
Original Surface
-
Base Coat
-
Flake Broadcast
-
Super Clear Polyaspartic
_edited.png)
Quartz Epoxy System
-
Original Surface
-
Base Coat
-
Quartz
-
Clear Coat
-
Quartz
-
Super Clear Polyaspartic